Generally you’d want to include Office Management Fields in your master document templates used for each inspection so that your job and client information from Office Management can simply import or merge automatically into your attachments whenever needed. Although most documents that come with your software would already be set to merge the most popular information, you may wish to adjust these documents or create new ones.
1. Use the Action pane or Word Processor to open the desired document template. Or for documents already attached, right-click them in the lower Attached Documents pane in your inspection and Open.
2. Create or modify your document as desired.
3. Position your cursor where you want to normally import Office Management data for each job, such as a name, address, or other information.
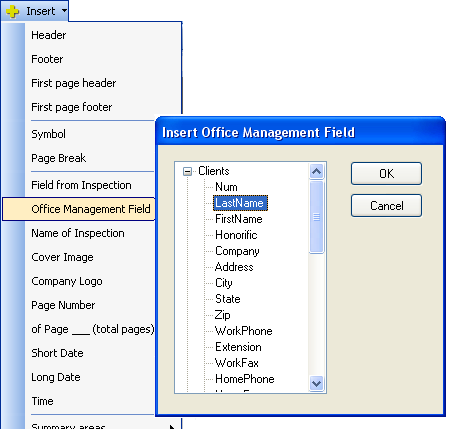
4. Choose Insert > Office Management Field from the toolbar options. Expand (click the plus) the desired Office Management table, highlight the desired field, and click OK to import the “Field” into your document.
5. The field or code that inserts into the document will be replaced with the actual appropriate job data later when the document is previewed or printed for a job or attached to a particular inspection.
6. Repeat Steps 3 & 4 for any additional fields you wish to include. Type any standard text, spaces, or punctuation that should always print in the document before, after, or between the merge fields.
7. When finished, save and exit your document. When the document is attached to your inspection (or reopened if editing a document already attached) the appropriate Office Management information merges.


 Need Support